Enabling Adaptive HDR Mode in Windows 11 OS
Enabling Adaptive HDR Mode in Windows 11 OS
“When I import videos from my iPhone 12 Pro to PremierPro, they look washed out or overexposed. As I understand things, this is because Dolby HDR is not supported.
Is there a workaround I can use to get the color back in my videos?
Also, any ideas when Adobe will eventually provide support for Dolby HDR?” – A user asked from Adobe Support Community
 Video Converter Factory Pro
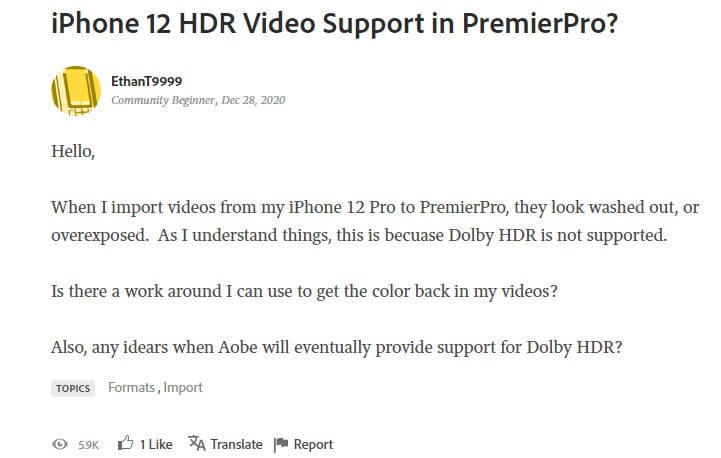
While the Adobe Premiere Pro software is useful tool for video editing, there are situations when the video quality looks overexposed. The quality appears blown out during the import process. This happens due to incompatibility issues with the Smart HDR feature in iPhone 12 series devices, which cannot work on older models.
There are particular ways in which it is possible to rectify the iPhone 12 HDR video quality issue. In this article, we discuss that further.

Part 1: What is Dolby Vision HDR Video in iPhone 12 or 13
Before we start discussing how to fix the iPhone HDR video problem at hand, one should understand what Dolby Vision HDR means in the first place. To note, it is a proprietary type of HDR format, with more data than SDR videos. This is because the camera quality with HDR effect can capture video recordings with extra data regarding the scenes, like shadows, highlights, and color range.
Moreover, the Dolby Vision type of HDR video iPhone 12 feature works with dynamic metadata, which is useful for tone-mapping images in frame-to-frame or scene-by-scene format. The iPhone 12 devices allow the user to shoot high-quality Dolby Vision HDR videos in 4K, at 30-60 FPS. That is possible with the support of extra RAM in these device models and the presence of the A14 Bionic system-on-chip. Not to mention, iPhone 12 models come with a 10-bit OLED display.
Such factors make the demand for Dolby Vision iPhone HDR video settings reasonable. However, the Dolby Vision quality only works on the most compatible devices with relevant display types. At this point, iPhone 12 is the only phone with this feature in the camera, which limits the ability to share 10-bit HDR videos to other devices or platforms, like Adobe Premiere Pro.
Having HDR-based video playing in the SDR display type would automatically make the colors look weird and washed out. If the software came with an SDR squash functionality for importing/exporting Dolby Vision HDR videos in SDR format, that would benefit users.
Part 2: Why the HDR videos on iPhone look washed out or overexposed?
It is inaccurate to assume that the iPhone HDR video issues like overexposure or washed-out appearance occur due to Adobe Premiere not supporting Dolby HDR. On the other hand, the more reasonable reason is that most of the screens and system versions do not work with this functionality.
So, even if you use the Premiere Pro software and import exact images with accurate color composition and resolution, the image quality might look bad on most devices. If a monitor supports the HDR quality and you choose the relevant color space, overexposure issues will be limited.
Therefore, there is a need to click the video with the HDR video camera and display it on the right platform/screen. In Premiere Pro, the Override into Rec.709 solution is available and can work to rectify this issue for some users.
With the right features like Color Workspace, Lumetri pre-sets, and other features, you can add them in a drag-and-drop manner to work on the project pane for more customizations.
The Premiere Pro 2022 version can work with the video clips as HDR after changing specific CM settings. The right monitoring setup must be prepared while working on this editing environment.
Also, it is important to consider the nits’ levels on screens to understand if a device can even display the iPhone 12 HDR video. These devices support a 10-bit OLED display type that can reach a peak brightness of 1200 nits. So, it is suitable to showcase the footage without much error.
Part 3: Most Effective 4 Ways to Fix Overexposed iPhone HDR video in Premiere Pro
The following are some of the feasible solutions we’ve gathered, you can take to handle the overexposure quality of HDR videos while using Premiere Pro.
 TubeDigger - online video downloader from mostly any site
Solution 1: Turn Off HDR or Export them without HDR
One of the easiest methods to avoid issues with iPhone HDR video is to switch off the HDR setting directly. In the newer iPhone models like the iPhone 12 series, the software would not automatically save the regular and HDR versions if you set it accordingly.
How to turn off HDR on your iPhone?
Step1On your iPhone, open the Settings menu from the list of apps.

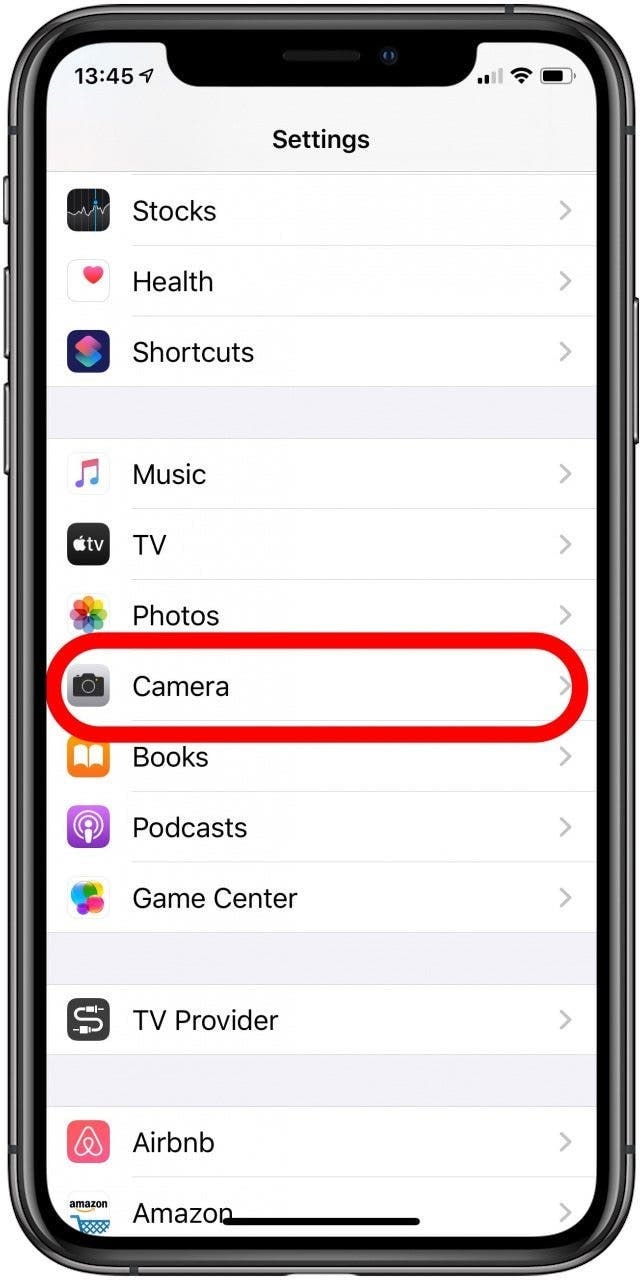
Step2Access the Camera tab.
Step3Under the HDR settings area, slide the toggle for Smart HDR to OFF.
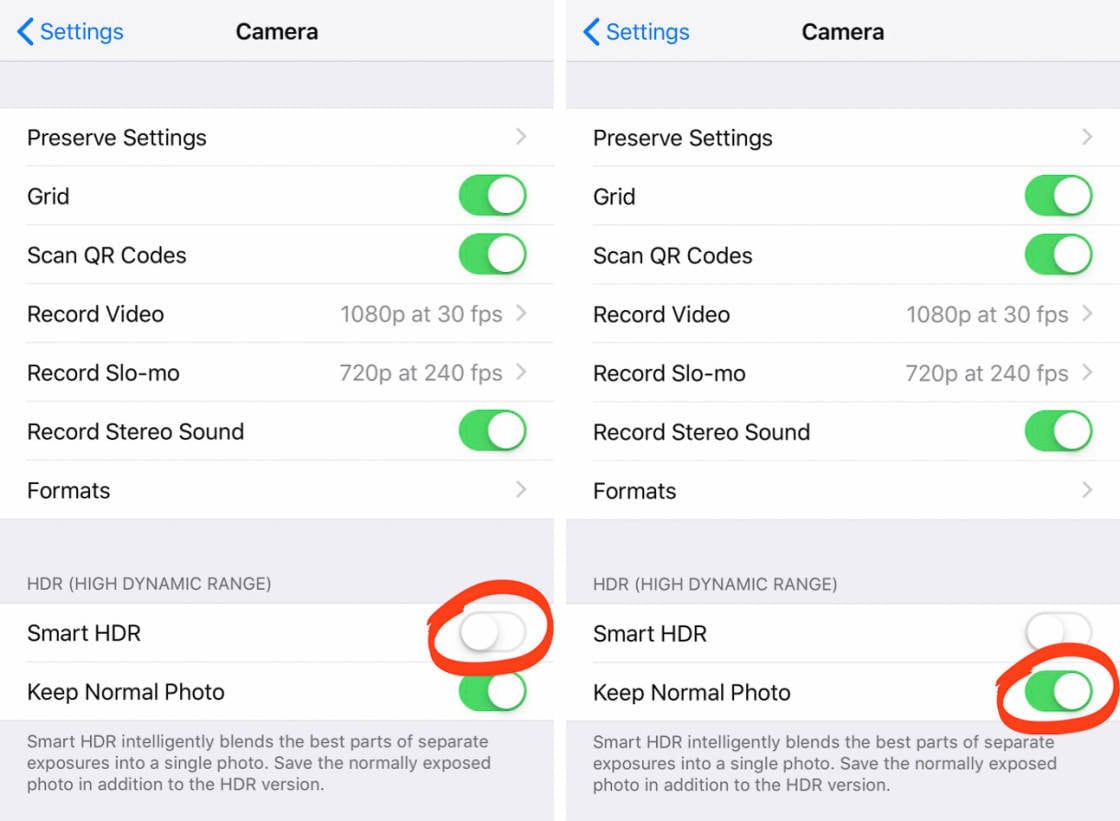
Step4On the regular Camera app, the yellow HDR icon will appear if you switch off Smart HDR. Click on it to either activate/deactivate the HDR function or choose the Auto HDR mode.
![]()
Note: Some steps may vary on some iPhone models when you manually control HDR. Click here to head to how to turn off HDR on iPhone 13.
Solution 2: Get a Video-Editing Software that you can Edit Dolby Vision Footage in [Recommended]
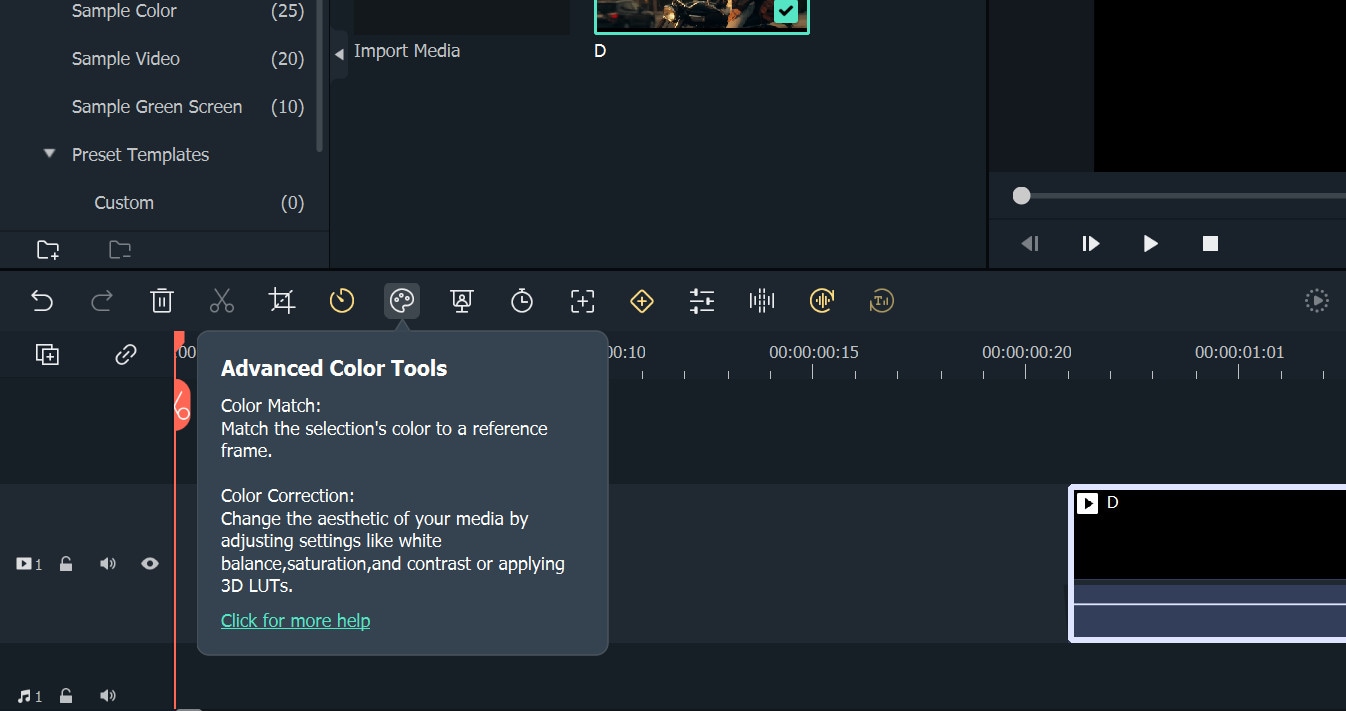
Wondershare Filmora is one of the best video editing software choices available currently, with a range of high-quality editing functions. You can add pre-set effects in the software package or adjust color grading in the videos. The two main color-related adjustments you can make are Color Correction and Color Match to sync the video visuals with zero washed-out look or distortions.
The only drawback here for editing Dolby Vision HDR footage is that it does not work directly on iPhones. You can make the edits on a Mac computer and then directly export them to iPhones. So, overall, using this software is the best option to try to convert HDR video to SDR iPhone, in our experience.
Free Download For Win 7 or later(64-bit)
Free Download For macOS 10.14 or later
How to edit iPhone HDR video using Filmora?
Step1Install Filmora and launch the software on your Mac device.
Step2Click on New Project > Click here to import media.
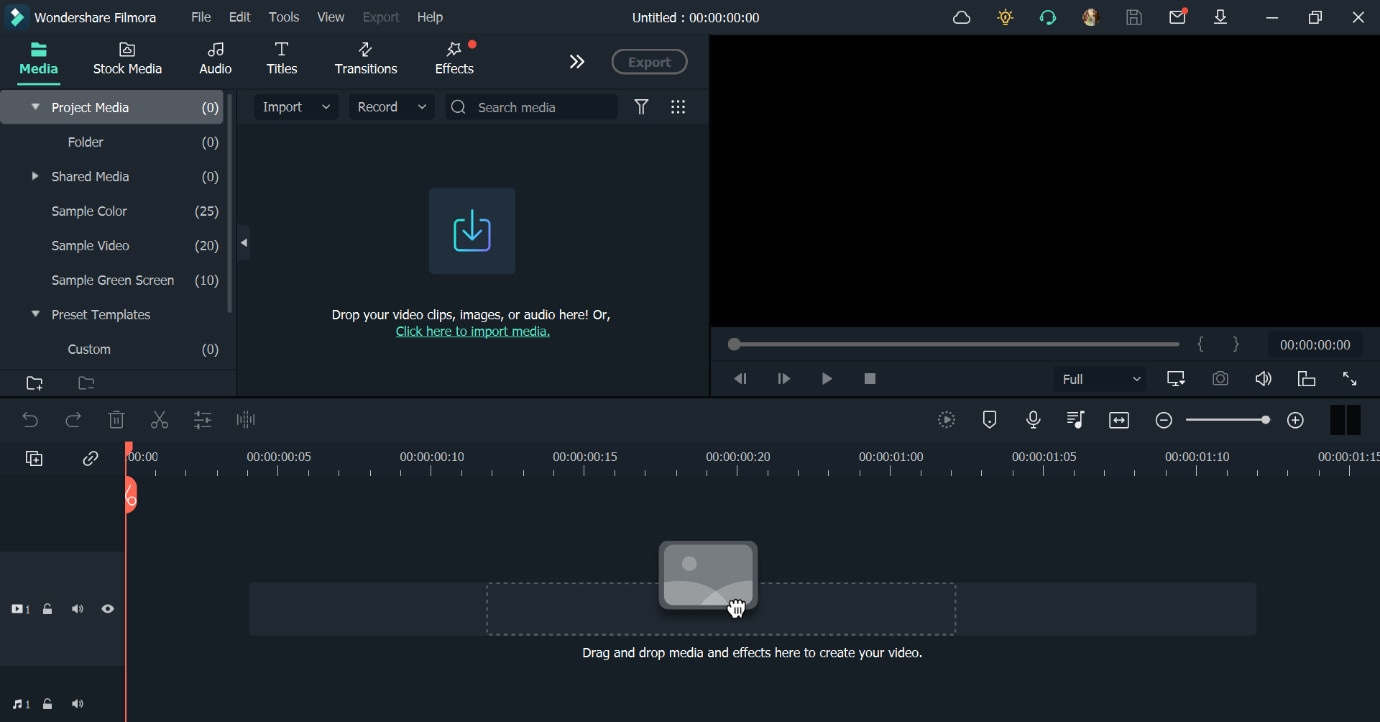
Choose the HDR video from the iPhone device that you transferred to the device in QuickTime Movie format (MOV).
Step3Drag and drop the video to the timeline section for editing the file.
Step4Make the necessary edits like Color Matching and Chroma key-based background removal/editing.
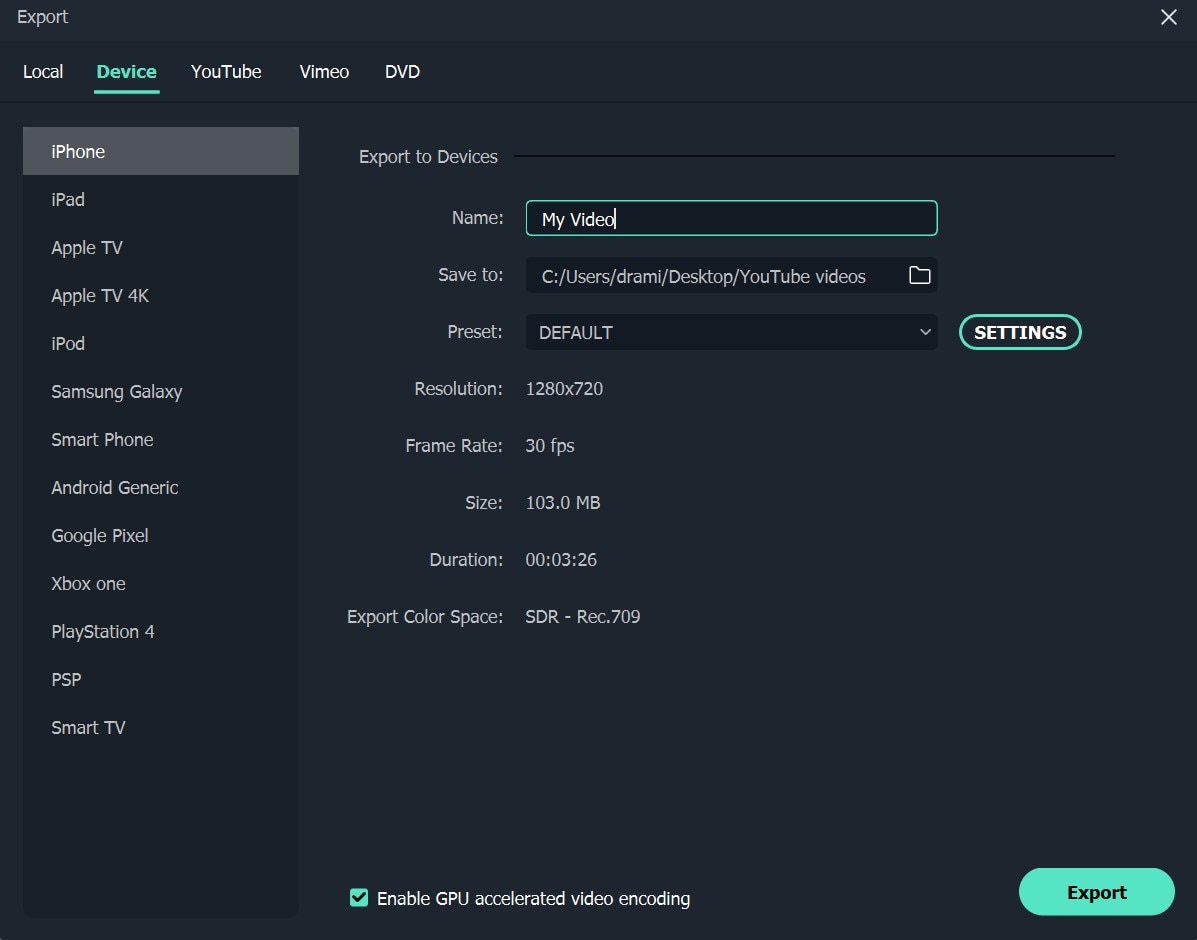
Step5Click on the Export button on top of the screen.
Step6Go to the Device tab and choose iPhone. Rename the file and make format settings here. The video will export for your device in SDR-Rec 709 format.

Solution 3: Edit Color Space Override with Rec 2020
One can use the Color Space Override technique to handle the issue of overexposure video quality. This is a solution that the official Adobe Premiere team provides as a failsafe solution. Here, the process works for files in JPEG 2000 MXF OP1a or () format.
During the export, you can change the file format to one of the two, depending on your file type. While following the JPEG 2000 route, make changes to the Depth/Chroma as RGB 4:4:4 12-bit PQ. Then, it is possible to turn to Rec 2020 from the Color Primitives setting.
On the other hand, you have to change the Main profile choice to Main 10 under the Video tab if you are changing to () format. Then, activate the Color Primaries for Rec.2020.
While this is an officially vetted process, we will not recommend it as a suitable solution here. The sequence may not work on some devices/systems and make the quality worse than before.
Solution 4: Change codec to change color translation into Premiere [Untested]
It is possible to directly load the file in QuickTime mode on the Mac device one is using. The process can take anything between 1 to 10 minutes for the whole exporting process to work, depending on the film’s length and network speed.
The newly imported file should have the same high-quality color resolutions that befit an HDR video. You might have to do some color tweaking first with third-party software, like Blackmagic video assist 7.
Not to mention, the quality of the video might not resemble the original perfectly. This method is not widely tested and authorized, so use it as a last resort or with a professional editor’s help.
Part 4: Hot FAQs on iPhone HDR Video
1. Does YouTube support Apple’s iPhone 12 Dolby Vision HDR videos?
YouTube does allow users to add HDR videos in the newer update. So, you can insert the Dolby Vision videos from iPhone 12 into the platform.
2. How to turn off HDR video Recording on iPhone?
You can directly turn off the HDR setting on your iPhone 12 devices, noted as Smart HDR, from Settings > Camera > Smart HDR. The steps for turning off HDR on iPhone are explained in Solution 1 under Part 3 in this article.
3. Is it possible to convert a Dolby Vision HDR video taken on an iPhone into a .mp4, .mov, or another video format?
Yes, users can convert their Dolby Vision HDR videos into other formats like MP4 or Quicktime MOV format. For this, using high-quality third-party converter solutions is necessary. Choose your option carefully.
Final Words
Overall, it is possible for the HDR quality videos captured with an iPhone 12 camera to look overexposed/washed out. This is because the Dolby Vision effect is not compatible with many devices and platforms and is not an issue with editing software like Premiere Pro. You can fix the problem by disabling the HDR effect, using a high-quality video editor like Filmora, or changing the color codec.
Free Download For Win 7 or later(64-bit)
Free Download For macOS 10.14 or later
Solution 2: Get a Video-Editing Software that you can Edit Dolby Vision Footage in [Recommended]
Wondershare Filmora is one of the best video editing software choices available currently, with a range of high-quality editing functions. You can add pre-set effects in the software package or adjust color grading in the videos. The two main color-related adjustments you can make are Color Correction and Color Match to sync the video visuals with zero washed-out look or distortions.
The only drawback here for editing Dolby Vision HDR footage is that it does not work directly on iPhones. You can make the edits on a Mac computer and then directly export them to iPhones. So, overall, using this software is the best option to try to convert HDR video to SDR iPhone, in our experience.
Free Download For Win 7 or later(64-bit)
Free Download For macOS 10.14 or later
How to edit iPhone HDR video using Filmora?
Step1Install Filmora and launch the software on your Mac device.
Step2Click on New Project > Click here to import media.
Choose the HDR video from the iPhone device that you transferred to the device in QuickTime Movie format (MOV).
Step3Drag and drop the video to the timeline section for editing the file.
Step4Make the necessary edits like Color Matching and Chroma key-based background removal/editing.
Step5Click on the Export button on top of the screen.
Step6Go to the Device tab and choose iPhone. Rename the file and make format settings here. The video will export for your device in SDR-Rec 709 format.
Solution 3: Edit Color Space Override with Rec 2020
One can use the Color Space Override technique to handle the issue of overexposure video quality. This is a solution that the official Adobe Premiere team provides as a failsafe solution. Here, the process works for files in JPEG 2000 MXF OP1a or () format.
During the export, you can change the file format to one of the two, depending on your file type. While following the JPEG 2000 route, make changes to the Depth/Chroma as RGB 4:4:4 12-bit PQ. Then, it is possible to turn to Rec 2020 from the Color Primitives setting.
On the other hand, you have to change the Main profile choice to Main 10 under the Video tab if you are changing to () format. Then, activate the Color Primaries for Rec.2020.
While this is an officially vetted process, we will not recommend it as a suitable solution here. The sequence may not work on some devices/systems and make the quality worse than before.
![]() FX PRO (Gold Robot + Silver Robot(Basic Package))
FX PRO (Gold Robot + Silver Robot(Basic Package))
Solution 4: Change codec to change color translation into Premiere [Untested]
It is possible to directly load the file in QuickTime mode on the Mac device one is using. The process can take anything between 1 to 10 minutes for the whole exporting process to work, depending on the film’s length and network speed.
The newly imported file should have the same high-quality color resolutions that befit an HDR video. You might have to do some color tweaking first with third-party software, like Blackmagic video assist 7.
Not to mention, the quality of the video might not resemble the original perfectly. This method is not widely tested and authorized, so use it as a last resort or with a professional editor’s help.

Part 4: Hot FAQs on iPhone HDR Video
1. Does YouTube support Apple’s iPhone 12 Dolby Vision HDR videos?
YouTube does allow users to add HDR videos in the newer update. So, you can insert the Dolby Vision videos from iPhone 12 into the platform.
2. How to turn off HDR video Recording on iPhone?
You can directly turn off the HDR setting on your iPhone 12 devices, noted as Smart HDR, from Settings > Camera > Smart HDR. The steps for turning off HDR on iPhone are explained in Solution 1 under Part 3 in this article.
3. Is it possible to convert a Dolby Vision HDR video taken on an iPhone into a .mp4, .mov, or another video format?
Yes, users can convert their Dolby Vision HDR videos into other formats like MP4 or Quicktime MOV format. For this, using high-quality third-party converter solutions is necessary. Choose your option carefully.
 PCDJ DEX 3 for Windows & MAC is the total entertainment DJ software solution, offering audio, video, and karaoke mixing ability. Automatic beat-sync, smart looping, 4 decks, DJ MIDI controller support, Karaoke Streaming and much more.
Final Words
Overall, it is possible for the HDR quality videos captured with an iPhone 12 camera to look overexposed/washed out. This is because the Dolby Vision effect is not compatible with many devices and platforms and is not an issue with editing software like Premiere Pro. You can fix the problem by disabling the HDR effect, using a high-quality video editor like Filmora, or changing the color codec.
Free Download For Win 7 or later(64-bit)
Free Download For macOS 10.14 or later
- Title: Enabling Adaptive HDR Mode in Windows 11 OS
- Author: Daniel
- Created at : 2024-07-25 02:19:04
- Updated at : 2024-07-26 02:19:04
- Link: https://extra-resources.techidaily.com/enabling-adaptive-hdr-mode-in-windows-11-os/
- License: This work is licensed under CC BY-NC-SA 4.0.