
"Unplug and Replay Twitch Livestream Techniques"
Unplug and Replay: Twitch Livestream Techniques
Twitch is a popular streaming platform that game lovers use to watch, play, and record gameplay. Along with that, you can also watch cooking shows, tutorials, and various sports events on Twitch efficiently. Moreover, you can also use this platform to endorse your product or brand by reaching the audience through live streams. However, it may be possible that you miss live streams on Twitch due to being stuck in another work.
If you have missed any important part from live streams on Twitch, this article is for you. By reading this article, you can learn how to rewind a Twitch stream using 5 different methods.
Method 1: With Easy Extension – Twitch DVR Player
Twitch DVR player is an excellent Chrome extension through which you can perform multiple functions. Through this extension, you can rewind a Twitch stream easily. By downloading this extension, you can easily shift between a regular Twitch player and a DVR player anytime. Thus, you can easily use this special extension to move back and forth during a live stream. To use this Chrome extension, follow the below steps:
Step1 To begin, you can go to the Chrome store and download the Twitch DVR Extension. From there, click on the “Add to Chrome” button to use this extension. You can also use this link to initiate the installation.

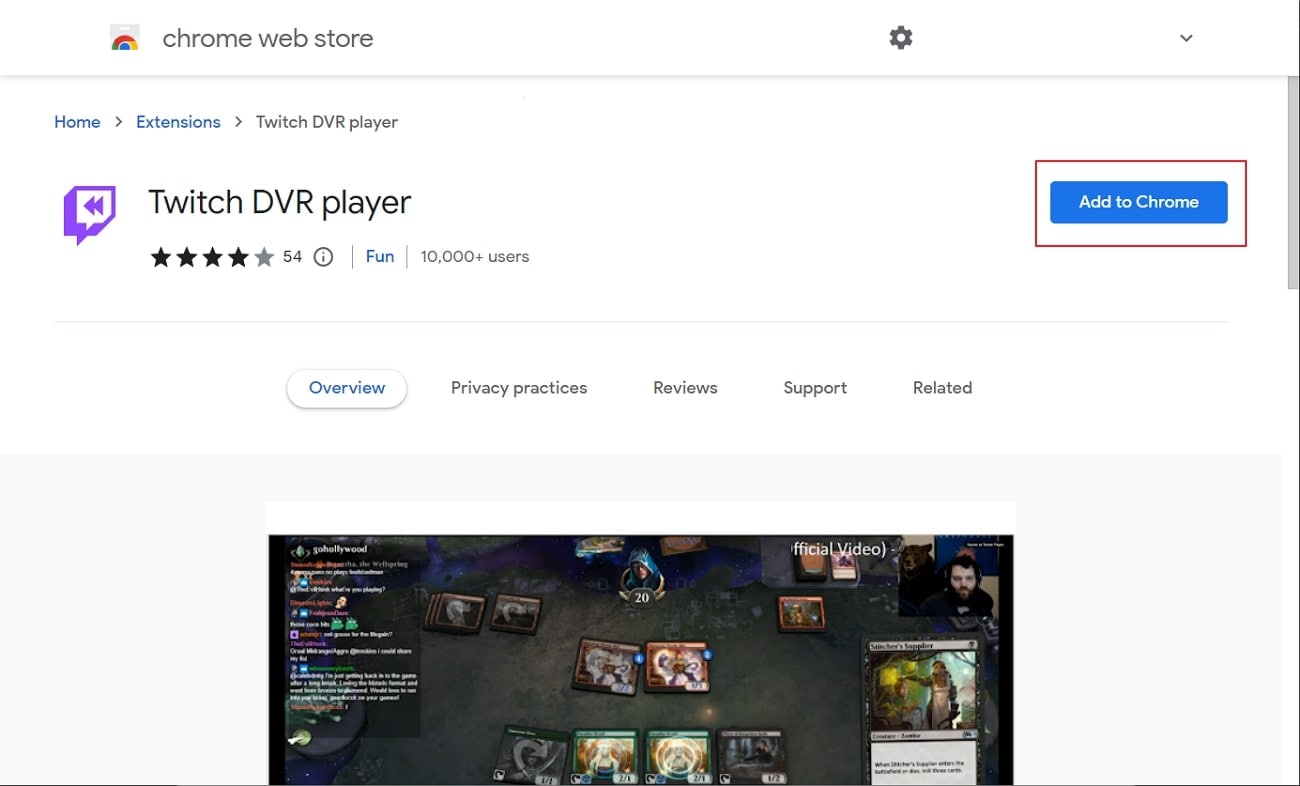
Step2 Once you have added this Chrome extension to your web browser, you can easily use it during a live stream on Twitch. Through this, you can easily move the playhead during a live stream on Twitch.


Many people can miss live streams on Twitch due to multiple reasons. However, you can use the VOD storage option to save your previous live broadcasts on your channel. This will help grow your audience, as anyone can visit and play your live broadcasts efficiently. Moreover, it instantly saves the previous broadcasts on your channel for 7 days. To watch a previous live stream on any streamer’s channel, check the below steps:
Step1 Open your Twitch account and navigate to your favorite streamer’s channel. Once done, click on the username to open their channel.
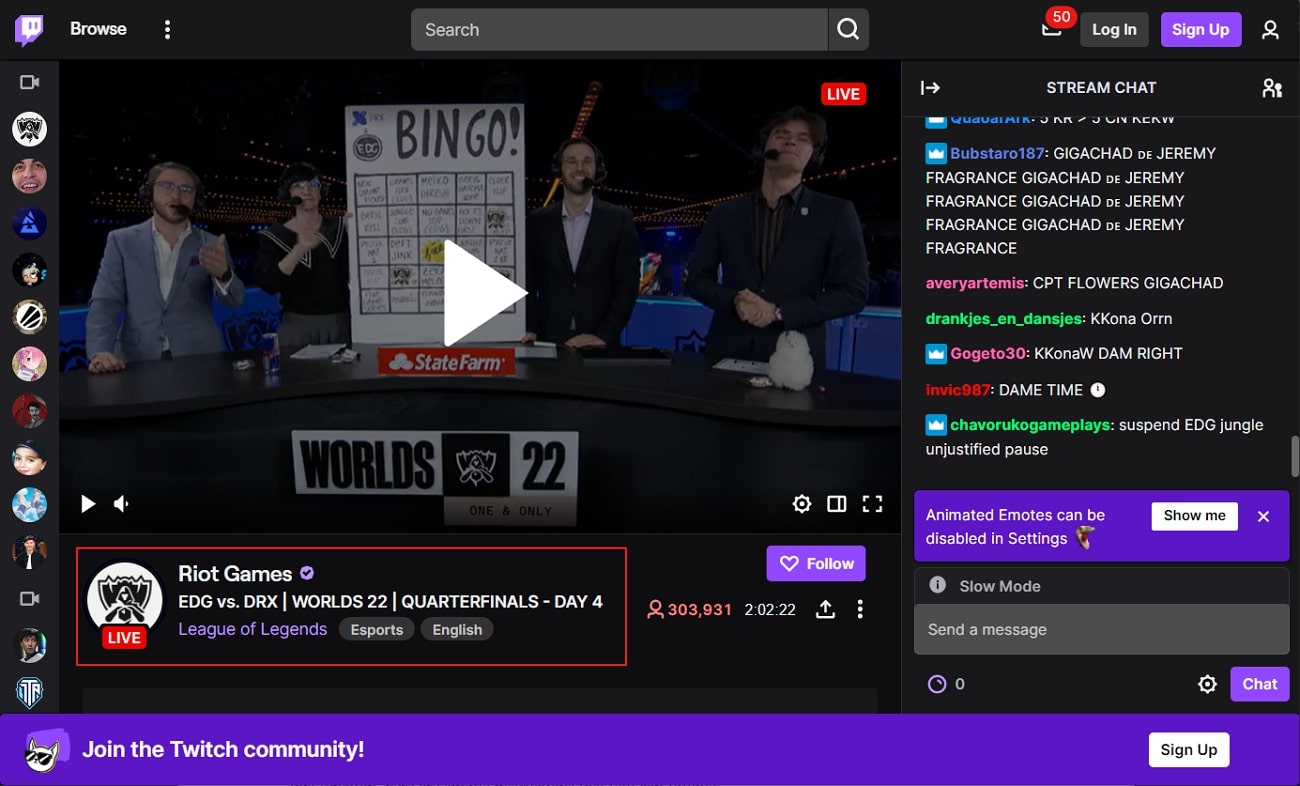
Step2 Now go to the “Videos” tab on their channel to check all the available past live broadcasts. Click on your preferred video and move its playhead easily. By doing so, you can watch any specific part of the stream efficiently.
 DLNow Video Downloader
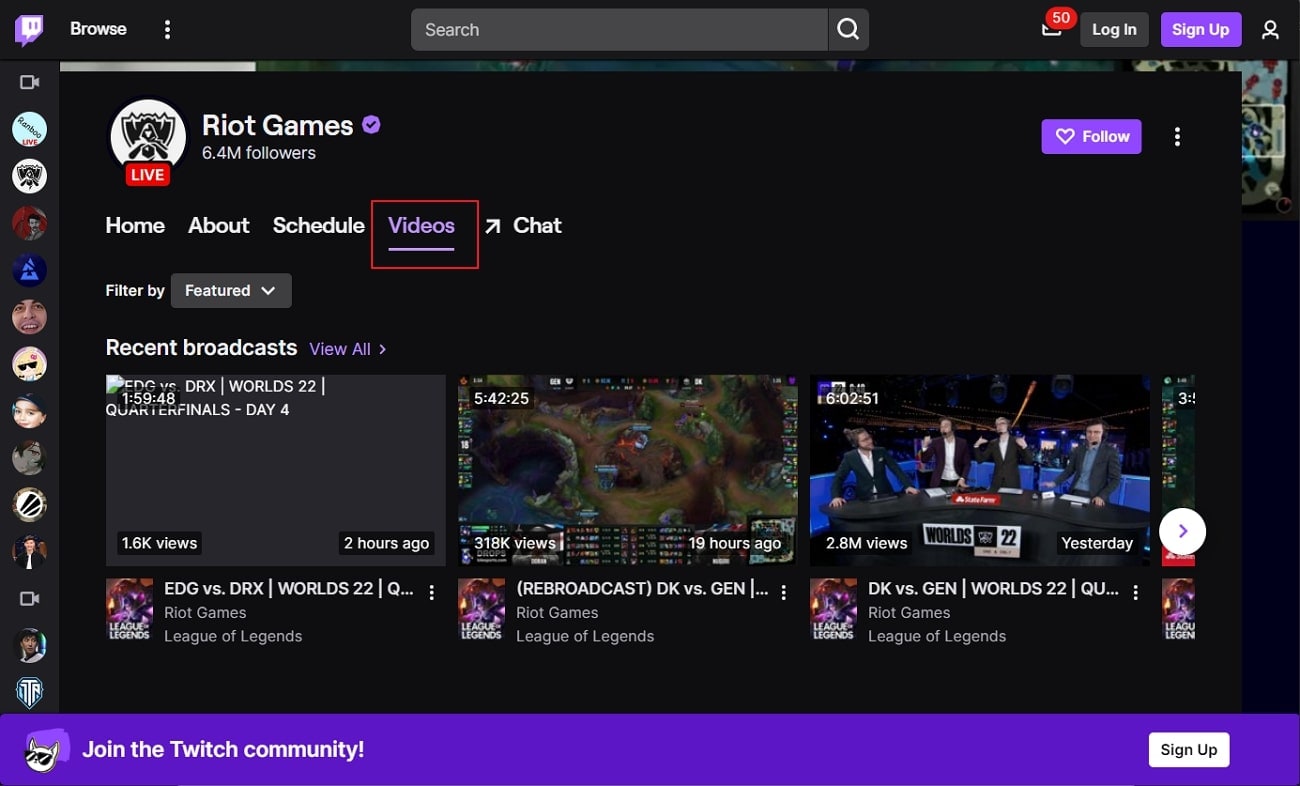
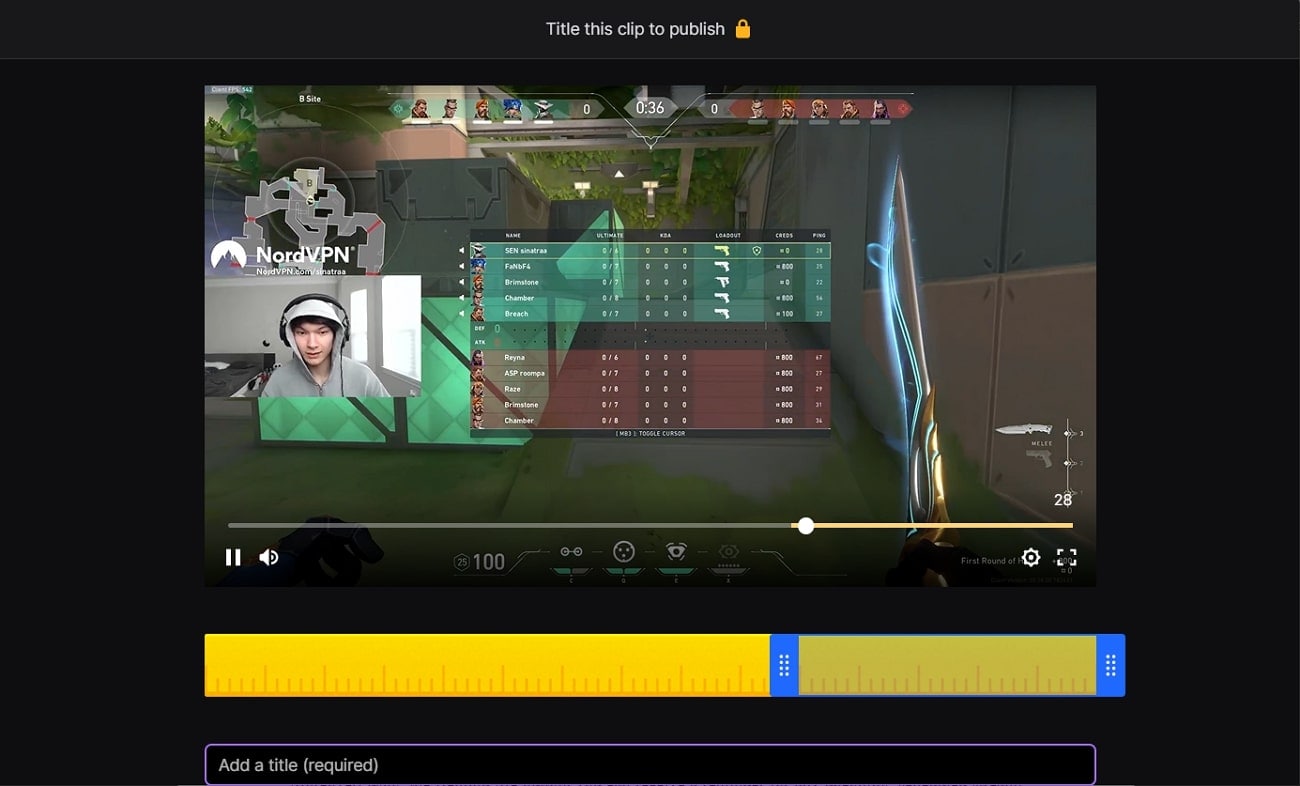
Method 3: Click the “Clip” button on Twitch
Twitch has a Clip button through which you can watch the previous 90 seconds of a live broadcast. Through this, you can quickly move back to the previous 90 seconds to listen to a particular part again. To rewind live stream Twitch using this function, here are simple instructions that you can follow:
Step1 While watching a live stream, go to the bottom right corner and click on the “Clip” icon. You can also press the shortcut keys “Alt + X” alternatively.
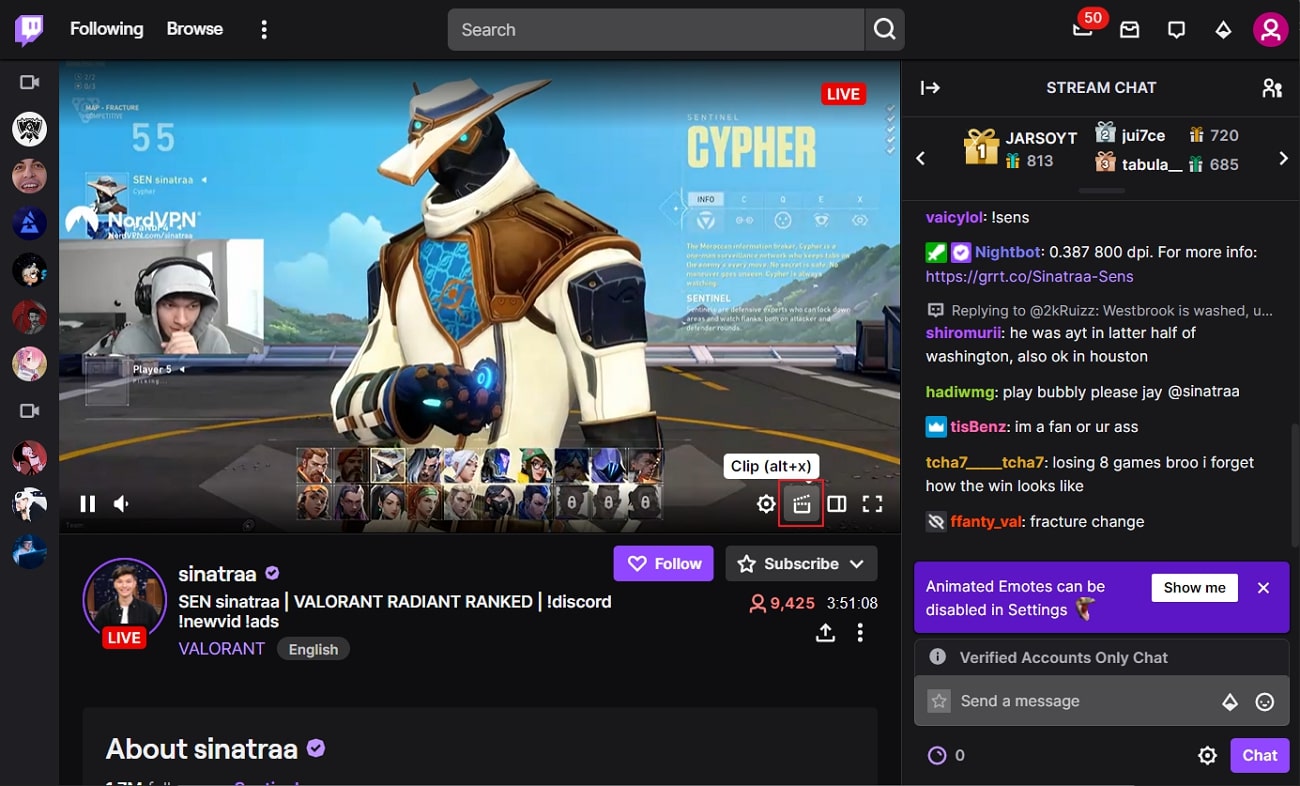
Step2 Once you have clicked on the “Clip” icon, you will redirected to a new window. By navigating through the playhead, you can watch the past 90 seconds of a live stream.
Method 4: Use the “Rewind the Stream” Button (Test)
Twitch aims to test with three buttons so that some users can enhance features to watch live streams. The expected new buttons on Twitch are Rewind the Stream, Remind Me, and Watch Trailer. Through Rewind the Stream button, a picture-in-picture window will open through which you can rewind two minutes of a stream. This feature can only be functional if the streamer has enabled the VODs.
Moreover, using the Remind Me button, you can receive a reminder for any upcoming scheduled stream. On the other hand, using the Watch Trailer option, you can play a trailer of a particular channel instantly. To use the Rewind the Stream button for Twitch rewind stream, check the below steps:
Step1 Open your Twitch app and go to any streamer’s channel that is holding a live stream. You can click on the “Rewind the Stream” button given on the bottom right side.
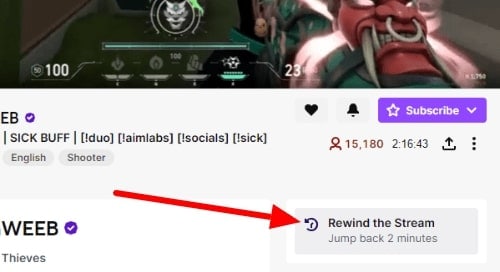
Step2 Now you can see the past 2 minutes of the stream on your screen easily. To leave the rewind screen, click on the “Go back to Live” option. This will redirect you to the live stream instantly.
Method 5: Save the Stream with Filmora Screen Recorder
Do you want to rewind live stream Twitch effortlessly? By using the Filmora Screen Recorder , you can easily capture any live stream on Twitch. After that, you can rewind any part of the live stream without any restrictions. This screen recorder for Twitch has an excellent capability to capture live streams with high audio and video quality.
You can also set custom settings to screen record the live stream according to your desire. Furthermore, if you want to trim or split any part of your recorded live stream on Twitch, use the Filmora editor. Through this editor, you can add smooth transitions and stunning effects with a few clicks. Also, you can modify the speed of your recorded videos through this platform efficiently.
Free Download For Win 7 or later(64-bit)
Free Download For macOS 10.14 or later
Thus, Wondershare Filmora is a complete tool consisting of all necessary functions and advanced features. To screen record a live stream on Twitch using Filmora, read the below steps:
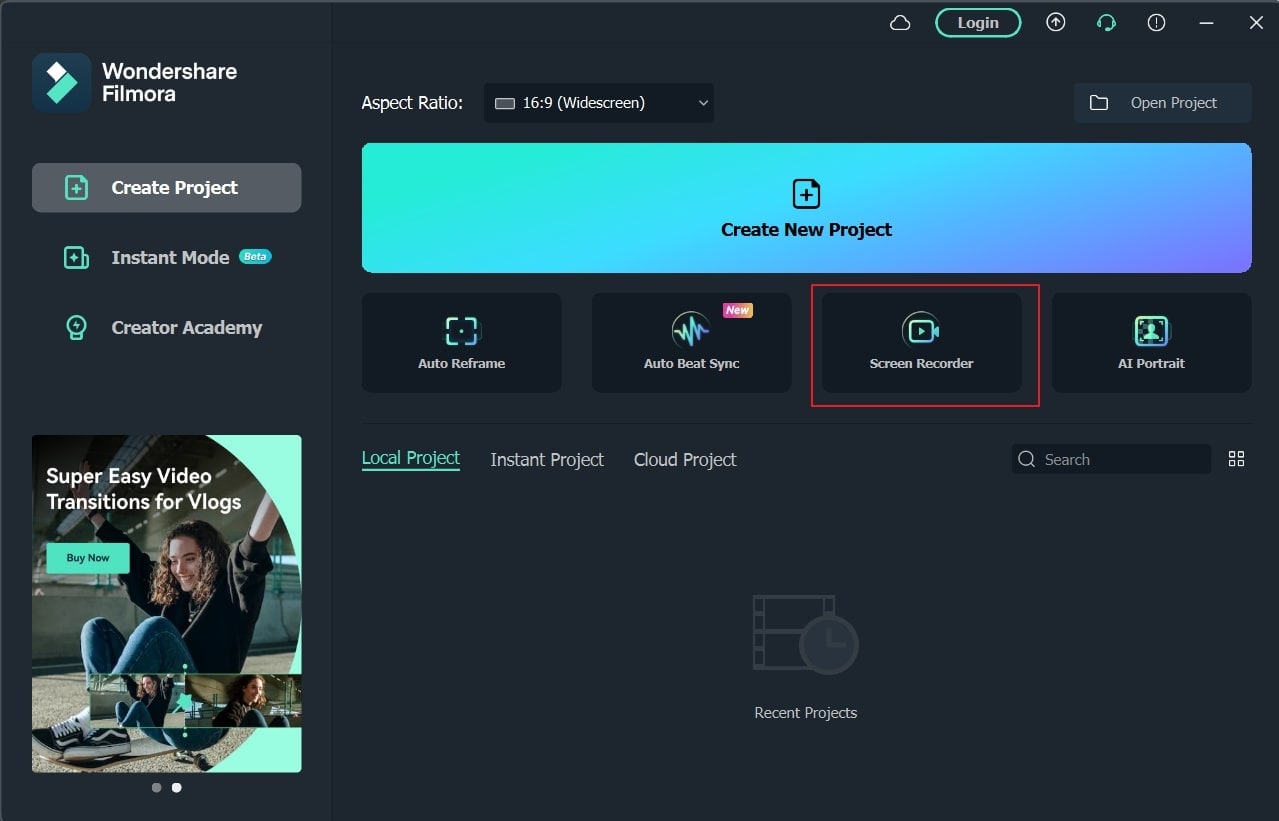
Step1 Choose Recording Mode
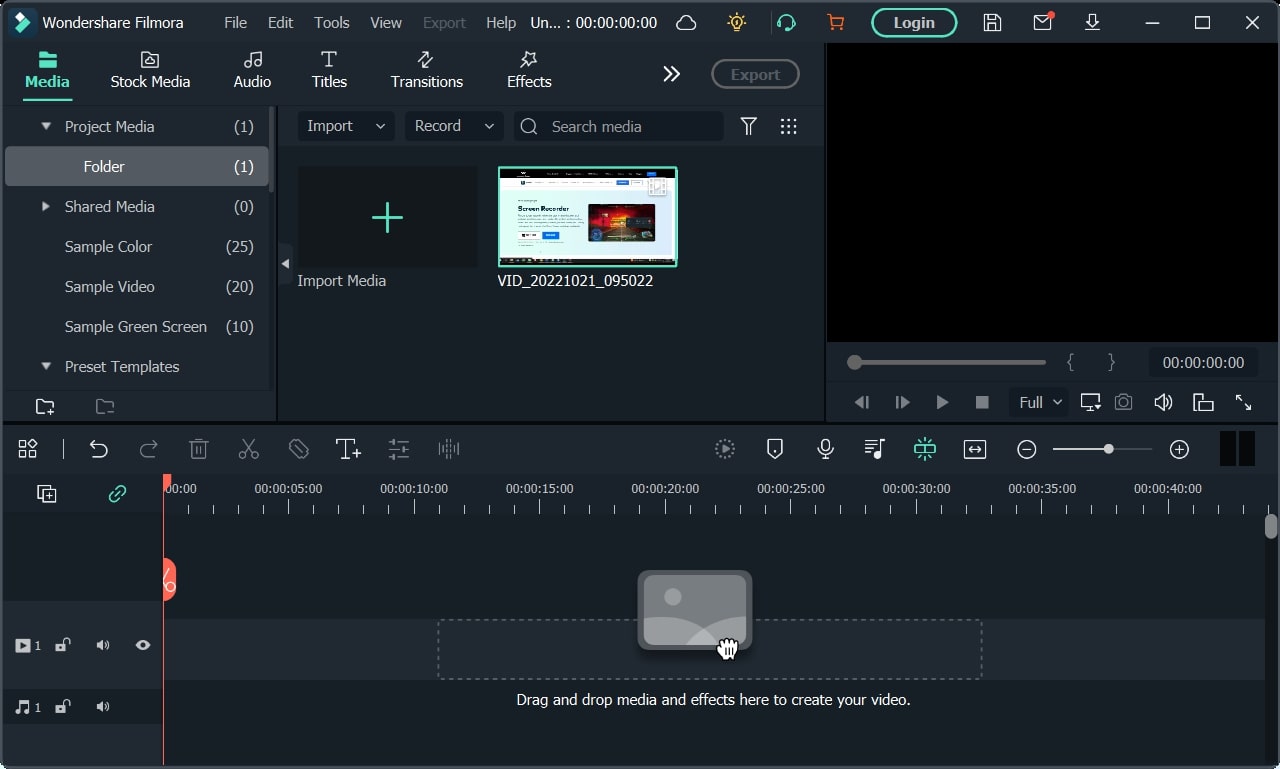
Launch Filmora on your PC and click on “Screen Recorder” from its interface. It will open a screen recorder window on your screen. On this window, you can choose your preferred recording modes, such as a full screen or a target window.
Step2 Select Frame Rate and Quality
You can also change the frame rate and quality of your recording from Settings. Once you have modified the settings according to your preference, hit the “REC” button.
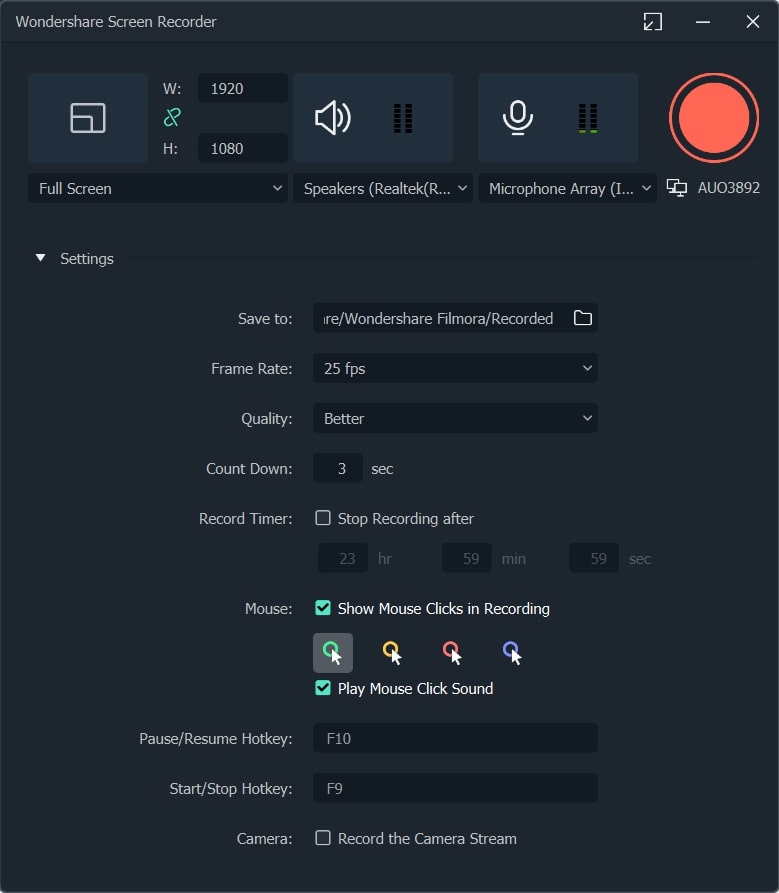
Step3 Begin and Stop the Recording
A countdown will appear on your screen. After that, the toll will begin the screen recording efficiently. To stop the recording anytime, press the F9 key. The screen recording will be automatically saved in the media library of Filmora.
Conclusion
Are you missing live streams on Twitch frequently? No need to worry as this article has provided different ways through which you can rewind live stream Twitch flawlessly. For greater ease, you can also use the screen recorder of Filmora to capture live streams on Twitch efficiently. By doing so, you can easily rewind a live stream without any complications. Filmora also offers a video editor that can also help you in modifying your recorded live streams professionally.
Free Download For macOS 10.14 or later
Thus, Wondershare Filmora is a complete tool consisting of all necessary functions and advanced features. To screen record a live stream on Twitch using Filmora, read the below steps:
Step1 Choose Recording Mode
Launch Filmora on your PC and click on “Screen Recorder” from its interface. It will open a screen recorder window on your screen. On this window, you can choose your preferred recording modes, such as a full screen or a target window.
Step2 Select Frame Rate and Quality
You can also change the frame rate and quality of your recording from Settings. Once you have modified the settings according to your preference, hit the “REC” button.
 WinUtilities Pro
Step3 Begin and Stop the Recording
A countdown will appear on your screen. After that, the toll will begin the screen recording efficiently. To stop the recording anytime, press the F9 key. The screen recording will be automatically saved in the media library of Filmora.
Conclusion
Are you missing live streams on Twitch frequently? No need to worry as this article has provided different ways through which you can rewind live stream Twitch flawlessly. For greater ease, you can also use the screen recorder of Filmora to capture live streams on Twitch efficiently. By doing so, you can easily rewind a live stream without any complications. Filmora also offers a video editor that can also help you in modifying your recorded live streams professionally.
- Title: Unplug and Replay Twitch Livestream Techniques
- Author: Daniel
- Created at : 2024-07-25 01:29:23
- Updated at : 2024-07-26 01:29:23
- Link: https://extra-resources.techidaily.com/unplug-and-replay-twitch-livestream-techniques/
- License: This work is licensed under CC BY-NC-SA 4.0.