![[Updated] Comprehensive Walkthrough Installing Windows Movie Maker 6.0](https://thmb.techidaily.com/20a1161c2d60e760a9d2866e0269161f0abce5bf45e09881a1912be2c7963695.jpg)
"[Updated] Comprehensive Walkthrough Installing Windows Movie Maker 6.0"
Comprehensive Walkthrough: Installing Windows Movie Maker 6.0
For PC editors, nothing has had as much of an impact than Windows Movie Maker 6.0 release. Without much luck, you’re probably driving yourself crazy trying to locate an installation file to Windows Movie Maker 6.0 download. This is due to the fact that it is a part of the set of utilities called Windows Live Essentials and not a separate program. However, by referring to the Windows Movie Maker 6.0 free download, we provide in this post, you may still get the 2012 version of this program on the Microsoft website.
Microsoft used to have a movie editing product called Windows Movie Maker 6. Windows Vista comes with Windows Movie Maker 6 from Microsoft. It gave the ability to make and edit films, as well as post them on OneDrive, Facebook, Vimeo, and YouTube. It was a component of the Windows Essentials software bundle. Without the development of video editing programs like the widely used Windows Movie Maker 6.0, none of the best would have been possible. Use this guide to download Windows Movie Maker 6.0 for free.
Part 1. Tech Specifications of Windows Movie Maker 6.0
Editing tools like Windows Movie Maker, also known as Windows Live Movie Maker or Windows Movie Maker 6.0, demonstrated that small production companies could create high-quality material. A tool called Movie Maker 6.0, which comes preinstalled on every Windows Vista PC, is intended to make it possible for users with just a basic understanding of technology to do this.
| Requirements | Compatibility of Windows Movie Maker 6.0 |
|---|---|
| Supported OS | Windows Vista, Windows 7, Windows 8, Windows 8.1, and Windows 10 |
| Processor | Pentium IV or higher |
| RAM | 1 GB RAM (2 GB recommended) |
| Free Hard Disk Space | 2 GB or more |
| Other Requirements | 800x600) resolution graphics card with at least a 16-bit graphics card |
Part 2. How to Download and Install Windows Movie Maker 6.0
Windows Movie Maker 6.0 works especially well for digital storytelling projects since it enables users to integrate text, music, narration, and images and video footage into a single digital video file. It significantly simplified the video editing procedure, bringing the complete production experience home and turning many of the independent producers into overnight successes that we see and value today.
How to Install and Download Windows Movie Maker 6.0
Step1 Download the Installer first
Click one of the links below to start the Windows Live Essentials 2012 Windows Movie Maker 6.0 download. Here you may get a standalone, full offline installation of Windows Live Essentials Movie Maker. This offline installation method for Windows Movie Maker 6.0 supports Windows XP, Vista, 7, 8, 8.1, and 32 as well as 64-bit versions of Windows.
Download Windows Movie Maker 6.0
Step2 Open the File and Make Changes
By launching the EXE file, you may decide whether to install every software included in the toolkit, such as Messenger, Mail, Writer, or OneDrive, or only certain ones. All that’s left to do is click the Install button and wait a little while for the procedure to be finished.
Step3 Install Windows Movie Maker 6.0
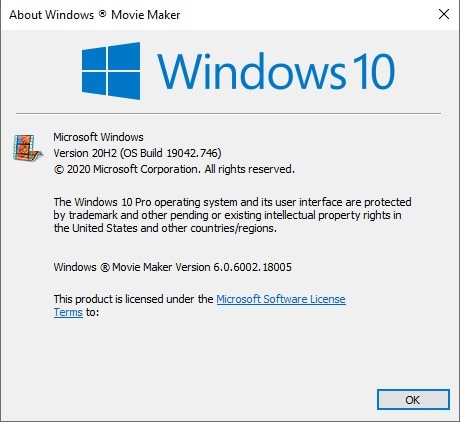
When you click the install button, Windows Movie Maker will then start to install. In a short period of time, the installation is complete. Windows Movie Maker may be added to your taskbar and given a desktop shortcut after a successful installation. Hit Ok after the initial launch window appears:
Part 3. How to Uninstall Windows Movie Maker 6.0
Programs and Features does not have a listing for Windows Movie Maker 6.0. You don’t have enough access to Windows Movie Maker to remove it. There are several issues that prevent Windows Movie Maker 6 from being removed. Numerous issues might arise from a Windows Movie Maker removal that is not complete. Because of this, it’s crucial to thoroughly uninstall Windows Movie Maker 6.0 and delete all of its associated files.
Steps On How to Remove It from Computer
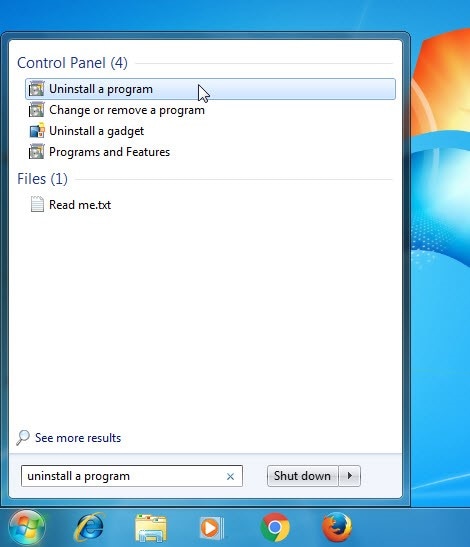
Step1 To remove this software, click Start, enter the term in the Search programs and files box, and then choose the suggestion.
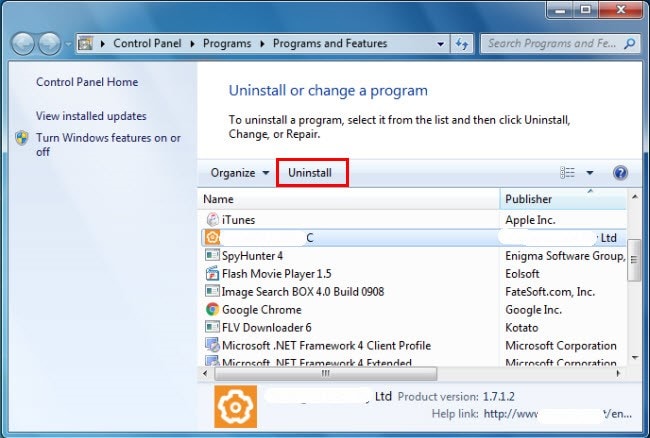
Step2 To begin the uninstallation, locate Windows Movie Maker in the list, click on it, and then click Uninstall. When the necessary file to uninstall Windows Movie Maker is damaged or missing, the software cannot be removed. Reinstalling Windows Movie Maker could work in this situation. To reinstall the application, launch the installer from either the original disk or the downloaded file. You may sometimes be able to fix or remove the software using the installer.
Part 4. How to Use Windows Movie Maker 6.0
Without a doubt, Windows Movie Maker 6.0 is a user-friendly video editing program that enables us to swiftly and easily create the film we have in mind. With Windows Movie Maker 6.0, chores may be completed quickly if you want to produce a film, whether it’s for a friend’s wedding, a music video, or a home movie. Although there are several methods to make a movie using Movie Maker, adhere to the guidelines below:
Steps To Use Windows Movie Maker 6.0:
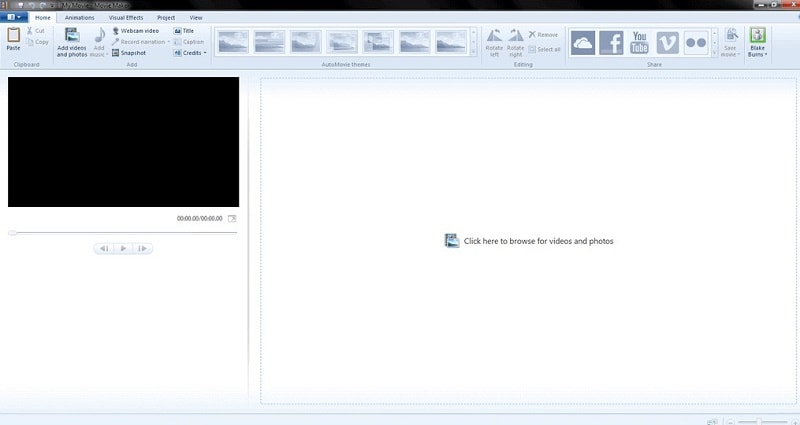
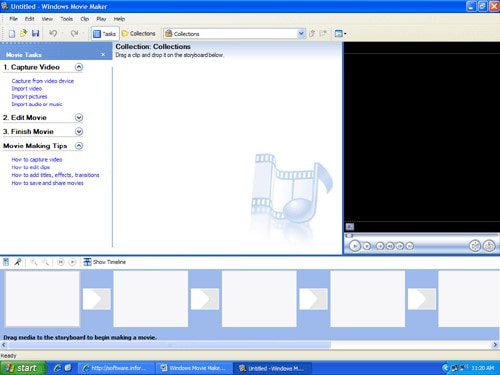
Step1 All of the files that may be dragged and dropped into the timeline or storyboard to make a film are shown in the Imported Media folder. It’s crucial to remember that before files may be utilized in any video production, they must first be imported into this folder. A video that you envision may be made by importing images, movies, and music.

Step2 By selecting the “Add movies and photographs” option from the “Home” page of the navigation bar, you may mix images, sound, and video to create films. You’ll see a window where you may choose the material you want to import into the program. Either a single item or a selection of files may be uploaded simultaneously.
Step3 The timeline bar’s slider and the play, stop, reverse, and forward buttons below the screen may both be used to move the player. The space bar may also be used to start and pause videos. To start editing, click on a certain movie clip. A highlighted area will be surrounded by a blue line.
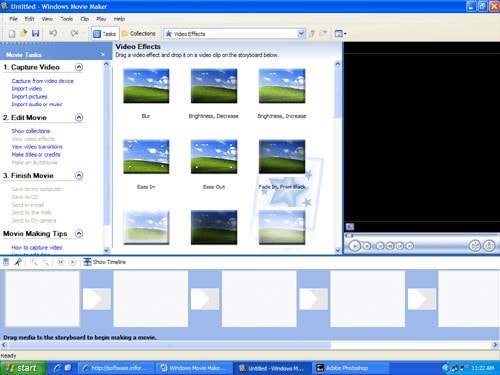
Step4 Windows Movie Maker 6 does come with a lot of brand-new transitions and effects. Among other things, you may split and change the pace of the imported video to create humorous or scary slow-motion or high-speed situations. Additionally, you may modify the music video to synchronize the visual and sound perfectly. Turn up the music’s volume, let it fade out gradually, and create the ideal setting.
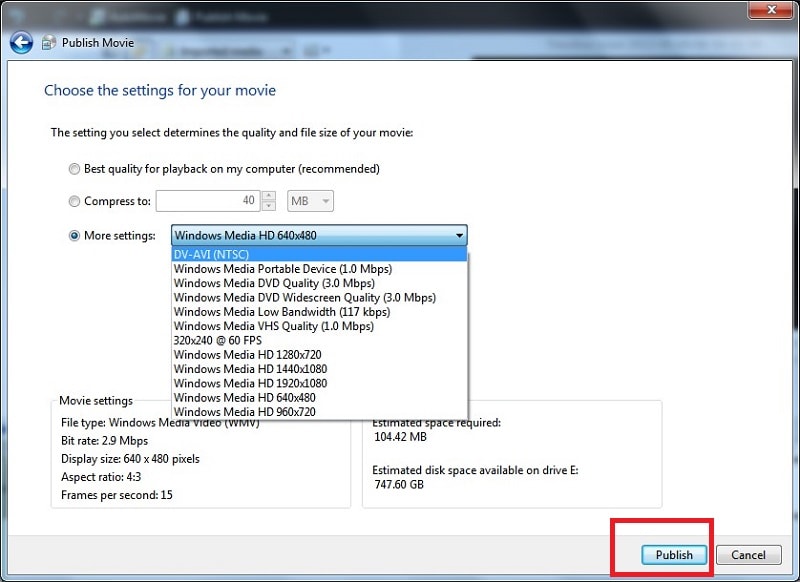
Step5 When your film is finished, sharing it online will be a breeze thanks to Windows Movie Maker’s ability to instantly submit your video to Facebook, YouTube, and other social networks. The Publish Video wizard is pretty familiar but has a few additional choices when you publish an altered movie to the computer. Only Windows Vista Home Premium and Ultimate versions have HD support.
Part 5. Pros and Cons of Movie Maker 6.0
Microsoft’s popular and user-friendly movie editor is called Windows Movie Maker. With Movie Maker 6.0, you may import recorded TV episodes into WMM, cut out the commercials, trim the beginning and conclusion, and then resave the program in a more space-saving format like WMV to your hard drive, copy it to DVD, or even distribute it over the Internet. Here are some other Pros and Cons:
Pros
- Use images or other videos to make your own movies or animations.
- Adding music from our music collection or downloading it from web sources is an option.
- Drag and drop the frames of a video into a timeline to change their order.
- Adjust the volume of any narrations, music, or videos.
- Your works may be saved locally, uploaded to the cloud, or emailed.
- Record audio narrators from a microphone and video from a webcam.
- Include visual transitions, captions, and image effects. You may also include opening or closing credits that include the actors, the director, the setting, or the OST composer.
Cons
- The program often hangs the whole PC.
- It cannot be removed via the Add/Remove control panel.
- A Windows Movie Maker 6.0 cannot be used for intricate editing.
Part 6. Alternative Ways to Edit Video in Windows PC
Although Windows Movie Maker 6 can’t be considered a significant update to the Flagship Windows Movie Maker program, it was, nevertheless, a decent improvement with some great new features. In contrast, Filmora by Wondershare is the best option for the users out there. It enables users to rapidly and simply create stunning movies using a number of advanced editing tools.
Overall, Filmora is an excellent tool since it is incredibly user-friendly and encourages meaningful connections between teachers and students. Its very user-friendly design makes it straightforward for anybody to become an excellent video editor. Software for editing videos that is available for free. So that you may use it for video editing as an alternative to Windows Movie Maker 6.0. Let’s refer to the steps involved in using this handy editor.
Steps On How to Edit Video with Filmora:
Free Download For Win 7 or later(64-bit)
Free Download For macOS 10.14 or later
Step1 Download and install Filmora
Visit the official website and download the most recent Wondershare Filmora version to start using it for editing. When the download is finished, run the program, and then select the New Project button to see the underlying window interface. You can then add the media files to the software.

Step2 Perform Professional Video Editing
To modify a video, right-click it and choose edit from the menu. The video may then be rotated by selecting the appropriate effects button. Depending on your needs, you may also rotate 90 degrees in either a clockwise or anticlockwise direction, flip level, or go vertical. In that case, then. A number of visual effects may also be added, and the best thing is that you can utilize others from the standard library as well, giving you more flexibility in where you place them.

Step3 Add Special Effects to Your Video
Wondershare Filmora is primarily the best choice to give your films a polished appearance. You may utilize a variety of its eye-catching and adjustable effects to make your video productions stand out from the competition. In this area, we’ve covered some of the best effects for bringing life to your dull, unprofessional films.

Step4 Save or Share the Videos
At the end of your editing journey, you may use the complete Filmora editor as previously mentioned when you’ve done editing the recorded video. When you want to submit your creative work right away to YouTube or another well-known website, click the Export option and choose the platform where you want to share your video.
Conclusion
With Internet’s evolution, it was difficult to predict the transformative effects these technologies would have on our entertainment, journalism, and companies. Windows Movie Maker 6.0 was the first program used in the production of YouTube videos. But today, Wondershare has the fulcrum of sound and video tools using its flagship product Filmora . It works well for beginners and intermediate users so you won’t have any hurdles using it to the full extent.
Part 2. How to Download and Install Windows Movie Maker 6.0
Windows Movie Maker 6.0 works especially well for digital storytelling projects since it enables users to integrate text, music, narration, and images and video footage into a single digital video file. It significantly simplified the video editing procedure, bringing the complete production experience home and turning many of the independent producers into overnight successes that we see and value today.
How to Install and Download Windows Movie Maker 6.0
Step1 Download the Installer first
Click one of the links below to start the Windows Live Essentials 2012 Windows Movie Maker 6.0 download. Here you may get a standalone, full offline installation of Windows Live Essentials Movie Maker. This offline installation method for Windows Movie Maker 6.0 supports Windows XP, Vista, 7, 8, 8.1, and 32 as well as 64-bit versions of Windows.
Download Windows Movie Maker 6.0
Step2 Open the File and Make Changes
By launching the EXE file, you may decide whether to install every software included in the toolkit, such as Messenger, Mail, Writer, or OneDrive, or only certain ones. All that’s left to do is click the Install button and wait a little while for the procedure to be finished.
Step3 Install Windows Movie Maker 6.0
When you click the install button, Windows Movie Maker will then start to install. In a short period of time, the installation is complete. Windows Movie Maker may be added to your taskbar and given a desktop shortcut after a successful installation. Hit Ok after the initial launch window appears:
Part 3. How to Uninstall Windows Movie Maker 6.0
Programs and Features does not have a listing for Windows Movie Maker 6.0. You don’t have enough access to Windows Movie Maker to remove it. There are several issues that prevent Windows Movie Maker 6 from being removed. Numerous issues might arise from a Windows Movie Maker removal that is not complete. Because of this, it’s crucial to thoroughly uninstall Windows Movie Maker 6.0 and delete all of its associated files.
Steps On How to Remove It from Computer
Step1 To remove this software, click Start, enter the term in the Search programs and files box, and then choose the suggestion.
Step2 To begin the uninstallation, locate Windows Movie Maker in the list, click on it, and then click Uninstall. When the necessary file to uninstall Windows Movie Maker is damaged or missing, the software cannot be removed. Reinstalling Windows Movie Maker could work in this situation. To reinstall the application, launch the installer from either the original disk or the downloaded file. You may sometimes be able to fix or remove the software using the installer.
Part 4. How to Use Windows Movie Maker 6.0
Without a doubt, Windows Movie Maker 6.0 is a user-friendly video editing program that enables us to swiftly and easily create the film we have in mind. With Windows Movie Maker 6.0, chores may be completed quickly if you want to produce a film, whether it’s for a friend’s wedding, a music video, or a home movie. Although there are several methods to make a movie using Movie Maker, adhere to the guidelines below:
Steps To Use Windows Movie Maker 6.0:
Step1 All of the files that may be dragged and dropped into the timeline or storyboard to make a film are shown in the Imported Media folder. It’s crucial to remember that before files may be utilized in any video production, they must first be imported into this folder. A video that you envision may be made by importing images, movies, and music.
Step2 By selecting the “Add movies and photographs” option from the “Home” page of the navigation bar, you may mix images, sound, and video to create films. You’ll see a window where you may choose the material you want to import into the program. Either a single item or a selection of files may be uploaded simultaneously.
Step3 The timeline bar’s slider and the play, stop, reverse, and forward buttons below the screen may both be used to move the player. The space bar may also be used to start and pause videos. To start editing, click on a certain movie clip. A highlighted area will be surrounded by a blue line.
Step4 Windows Movie Maker 6 does come with a lot of brand-new transitions and effects. Among other things, you may split and change the pace of the imported video to create humorous or scary slow-motion or high-speed situations. Additionally, you may modify the music video to synchronize the visual and sound perfectly. Turn up the music’s volume, let it fade out gradually, and create the ideal setting.
Step5 When your film is finished, sharing it online will be a breeze thanks to Windows Movie Maker’s ability to instantly submit your video to Facebook, YouTube, and other social networks. The Publish Video wizard is pretty familiar but has a few additional choices when you publish an altered movie to the computer. Only Windows Vista Home Premium and Ultimate versions have HD support.
Part 5. Pros and Cons of Movie Maker 6.0
Microsoft’s popular and user-friendly movie editor is called Windows Movie Maker. With Movie Maker 6.0, you may import recorded TV episodes into WMM, cut out the commercials, trim the beginning and conclusion, and then resave the program in a more space-saving format like WMV to your hard drive, copy it to DVD, or even distribute it over the Internet. Here are some other Pros and Cons:
Pros
- Use images or other videos to make your own movies or animations.
- Adding music from our music collection or downloading it from web sources is an option.
- Drag and drop the frames of a video into a timeline to change their order.
- Adjust the volume of any narrations, music, or videos.
- Your works may be saved locally, uploaded to the cloud, or emailed.
- Record audio narrators from a microphone and video from a webcam.
- Include visual transitions, captions, and image effects. You may also include opening or closing credits that include the actors, the director, the setting, or the OST composer.
Cons
- The program often hangs the whole PC.
- It cannot be removed via the Add/Remove control panel.
- A Windows Movie Maker 6.0 cannot be used for intricate editing.
Part 6. Alternative Ways to Edit Video in Windows PC
Although Windows Movie Maker 6 can’t be considered a significant update to the Flagship Windows Movie Maker program, it was, nevertheless, a decent improvement with some great new features. In contrast, Filmora by Wondershare is the best option for the users out there. It enables users to rapidly and simply create stunning movies using a number of advanced editing tools.
Overall, Filmora is an excellent tool since it is incredibly user-friendly and encourages meaningful connections between teachers and students. Its very user-friendly design makes it straightforward for anybody to become an excellent video editor. Software for editing videos that is available for free. So that you may use it for video editing as an alternative to Windows Movie Maker 6.0. Let’s refer to the steps involved in using this handy editor.
Steps On How to Edit Video with Filmora:
Free Download For Win 7 or later(64-bit)
Free Download For macOS 10.14 or later
Step1 Download and install Filmora
Visit the official website and download the most recent Wondershare Filmora version to start using it for editing. When the download is finished, run the program, and then select the New Project button to see the underlying window interface. You can then add the media files to the software.
Step2 Perform Professional Video Editing
To modify a video, right-click it and choose edit from the menu. The video may then be rotated by selecting the appropriate effects button. Depending on your needs, you may also rotate 90 degrees in either a clockwise or anticlockwise direction, flip level, or go vertical. In that case, then. A number of visual effects may also be added, and the best thing is that you can utilize others from the standard library as well, giving you more flexibility in where you place them.
Step3 Add Special Effects to Your Video
Wondershare Filmora is primarily the best choice to give your films a polished appearance. You may utilize a variety of its eye-catching and adjustable effects to make your video productions stand out from the competition. In this area, we’ve covered some of the best effects for bringing life to your dull, unprofessional films.
Step4 Save or Share the Videos
At the end of your editing journey, you may use the complete Filmora editor as previously mentioned when you’ve done editing the recorded video. When you want to submit your creative work right away to YouTube or another well-known website, click the Export option and choose the platform where you want to share your video.
Conclusion
With Internet’s evolution, it was difficult to predict the transformative effects these technologies would have on our entertainment, journalism, and companies. Windows Movie Maker 6.0 was the first program used in the production of YouTube videos. But today, Wondershare has the fulcrum of sound and video tools using its flagship product Filmora . It works well for beginners and intermediate users so you won’t have any hurdles using it to the full extent.
Also read:
- [New] Audio-to-Text Converter for Videos
- [New] Crafting YouTube Video Trailers with Filmora's Guide for 2024
- [New] In 2024, Capturing the Moment Methods for Online Audio Recording
- [Updated] A Comprehensive Guide Top 12 Websites for Gratis Photo Libraries
- [Updated] Launching Your Sports Network From a Mac Desktop
- [Updated] The Art of Sound in Slides Adding and Capturing Audiotracks for 2024
- A Step-By Step Guide to Crafting Captivating Podcast Scripts (Plus Free Examples)
- Advanced VR Tech for Drone Enthusiasts for 2024
- Astronomy's Best Showcase - 10 Prime HD Sky Archives for 2024
- Audio Calls Tracker IPhone Voice Memo for 2024
- Audiovisual Decision-Making Is Podcast or YouTube More Appealing?
- Connect to the World with Our 12 Video Livestreams
- Delight in Delivery 7 Upgraded Opening Ways
- Integrating PS Remotes Into Switch Gameplay Successfully
- No Go for Code Run
- Step-by-Step Guide: Quickly Exporting Content in Final Cut Pro
- Transformative Moment: OpenAI Releases GPT-4
- Title: [Updated] Comprehensive Walkthrough Installing Windows Movie Maker 6.0
- Author: Daniel
- Created at : 2024-12-07 17:39:30
- Updated at : 2024-12-08 16:17:38
- Link: https://extra-resources.techidaily.com/updated-comprehensive-walkthrough-installing-windows-movie-maker-60/
- License: This work is licensed under CC BY-NC-SA 4.0.